From Volkswagens, to salmon, to cleaning stoves…. Go figure.

It all starts in Kodiak, Alaska…

LaMer’s common companion, Restless C

…where I hire on as cook and skiff pilot aboard LaMer, a 40’ steel-hulled salmon seiner based in Dog Harbor. After stowing 7 shopping carts full of provisions in every nook and cranny of the cabin, my immediate problem is the barely-working diesel stove on which I’m supposed to prepare meals.

Bob Bowser is the captain and owner of the boat. He’s a big guy, a welder and mechanic by trade down in the lower 48, and from the shopping list he’d given me, it’s clear that he is particular about what he eats. Considering all that, I find it strange when he tells me the stove hasn’t worked in a while, has no idea what’s wrong with it, and has no suggestions on how to fix it. Hah! So just what the heck am I supposed to do? I know nothing about being a cook, I have never worked on a fishing boat, and about piloting a 400 horsepower skiff, I have absolutely no clue whatsoever.

Well… There are two things that I do know, absolutely and for certain: One: tomorrow morning we are heading out for maybe three weeks or more. Two: having heard that on the water, problems somehow end up conveniently falling overboard, the very last place I want to be, with my captain and crew wondering why they aren’t getting hot meals, is in the middle of the foggy, rainy, windy, and very cold north Pacific. I must - right away - figure out how to make sense of this danged diesel cooking contraption. Three! There are three things I know for absolutely certain.

Poking around, this stove doesn’t look or behave like any kitchen stove, camping stove, or anything else I’ve ever cooked on. It lights with a match, has a switch for a blower, belches out black smoke, and its oven won’t go past 200 degrees.

As I continue to explore, gradually, those characteristics start to ring familiar. Wait a second…. Yes! My old 1966 Volkswagen Squareback! This stove’s quirks are practically the same as those of the odd gasoline-fed air heater in that car. It sat on top of the gas tank, glowing a disconcerting cherry red, forcing its heated air into the passenger compartment with a vibrating drone. My salvation here in Dog Harbor just might be my experience working on that car’s insane buzz bomb heater back in Illinois.

So, I get to work: clean out the soot, adjust the fuel feed, discover a completely closed air shutter and set it open. Like magic, with the touch of a match, the lanky yellow flames that had been emitting wispy ribbons of black soot transform into crisp little, smokeless blue cones. The temperature shoots up and - thank God Almighty - this little iron stove cranks out the heat. From that day and throughout the entire season, it reliably yields a hot mess of baked salmon and halibut, casseroles, biscuits, pies, bread, and more.

We love transforming crudded-up cooking contraptions into the clean machines that everyone in your crew benefits from and enjoys using. Need a deep clean for a stove? Contact us to make an appointment.

Salmon Skiff pilot Joe Oliver

Cooking on a Retro Stove: English Muffins

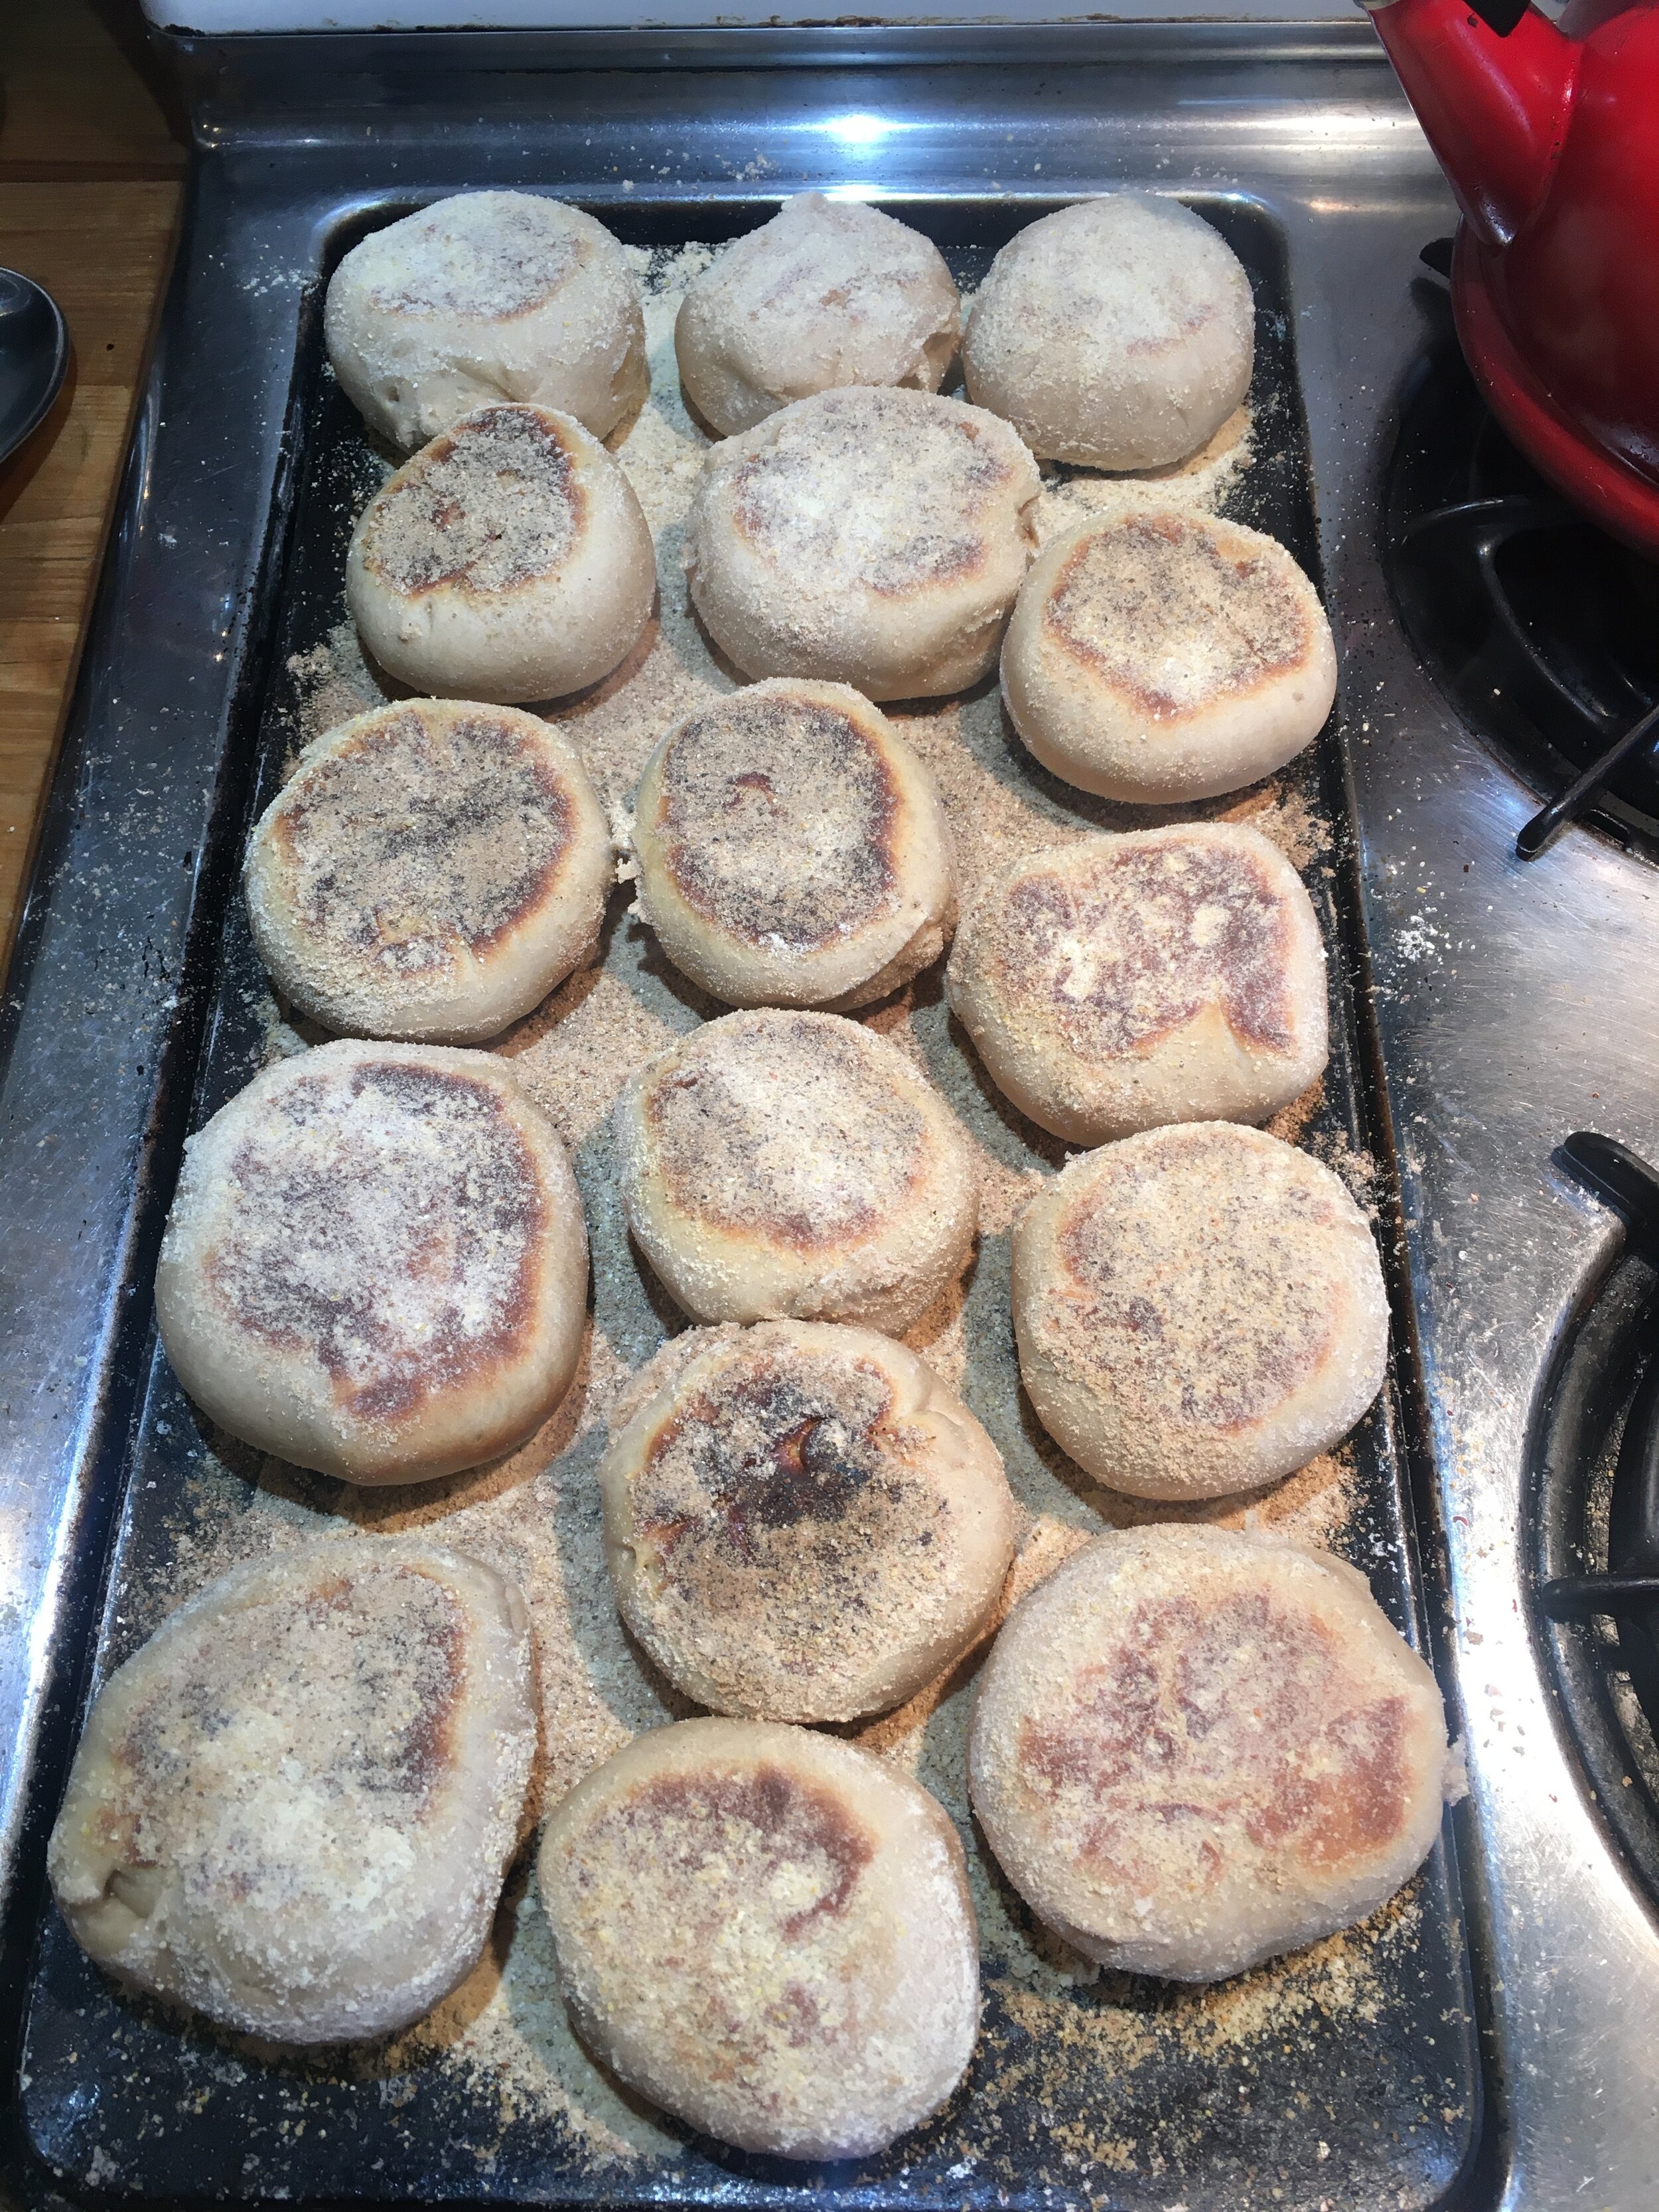
There’s a lot to love about owning a vintage stove, but one of the most satisfying things is discovering a great recipe that takes full advantage of a retro stove’s unique features. I recently made my first-ever batch of King Arthur Flour’s English Muffins and was delighted to find that my Chambers stove’s griddle streamlined the cooking process considerably.

According to this excellent recipe, the best way to prepare English muffins for their final rise is to place them on a cold griddle and then simply turn on the heat underneath them when it’s time to cook. King Arthur estimates that a 16-muffin batch requires two modern griddles, noting that “since you probably don’t have two griddles, you’ll need to cook the muffins in shifts.” Well, I’m happy to report that the Chambers griddle is perfectly sized to cook a full batch all at once! 

Sixteen delicious homemade English muffins, all cooked on a single Chambers stove griddle.

Sixteen delicious homemade English muffins, all cooked on a single Chambers stove griddle.

For the perfect rise, I removed the griddle from the stove and gently propped it up to create a nice flat surface before placing my muffins. When it was time to cook, I simply lit the broiler and replaced the griddle. The whole process couldn’t have been easier, and my muffins were done in half the time they would have taken if I had cooked them on a modern stove.

If you have a Chambers griddle and haven’t made your own English muffins, I highly recommend trying this recipe. The muffins are simple to make, freeze beautifully, thaw quickly, taste far better than store-bought, and are incredibly versatile. With a frozen stash, you’re halfway to making mini pizzas, eggs Benedict, breakfast sandwiches, and a divine-in-its-simplicity toasted and buttered muffin.

There’s a homemade English muffin under the poached eggs, chives, bacon, and spinach.

There’s a homemade English muffin under the poached eggs, chives, bacon, and spinach.

Living With a Vintage Chambers Stove

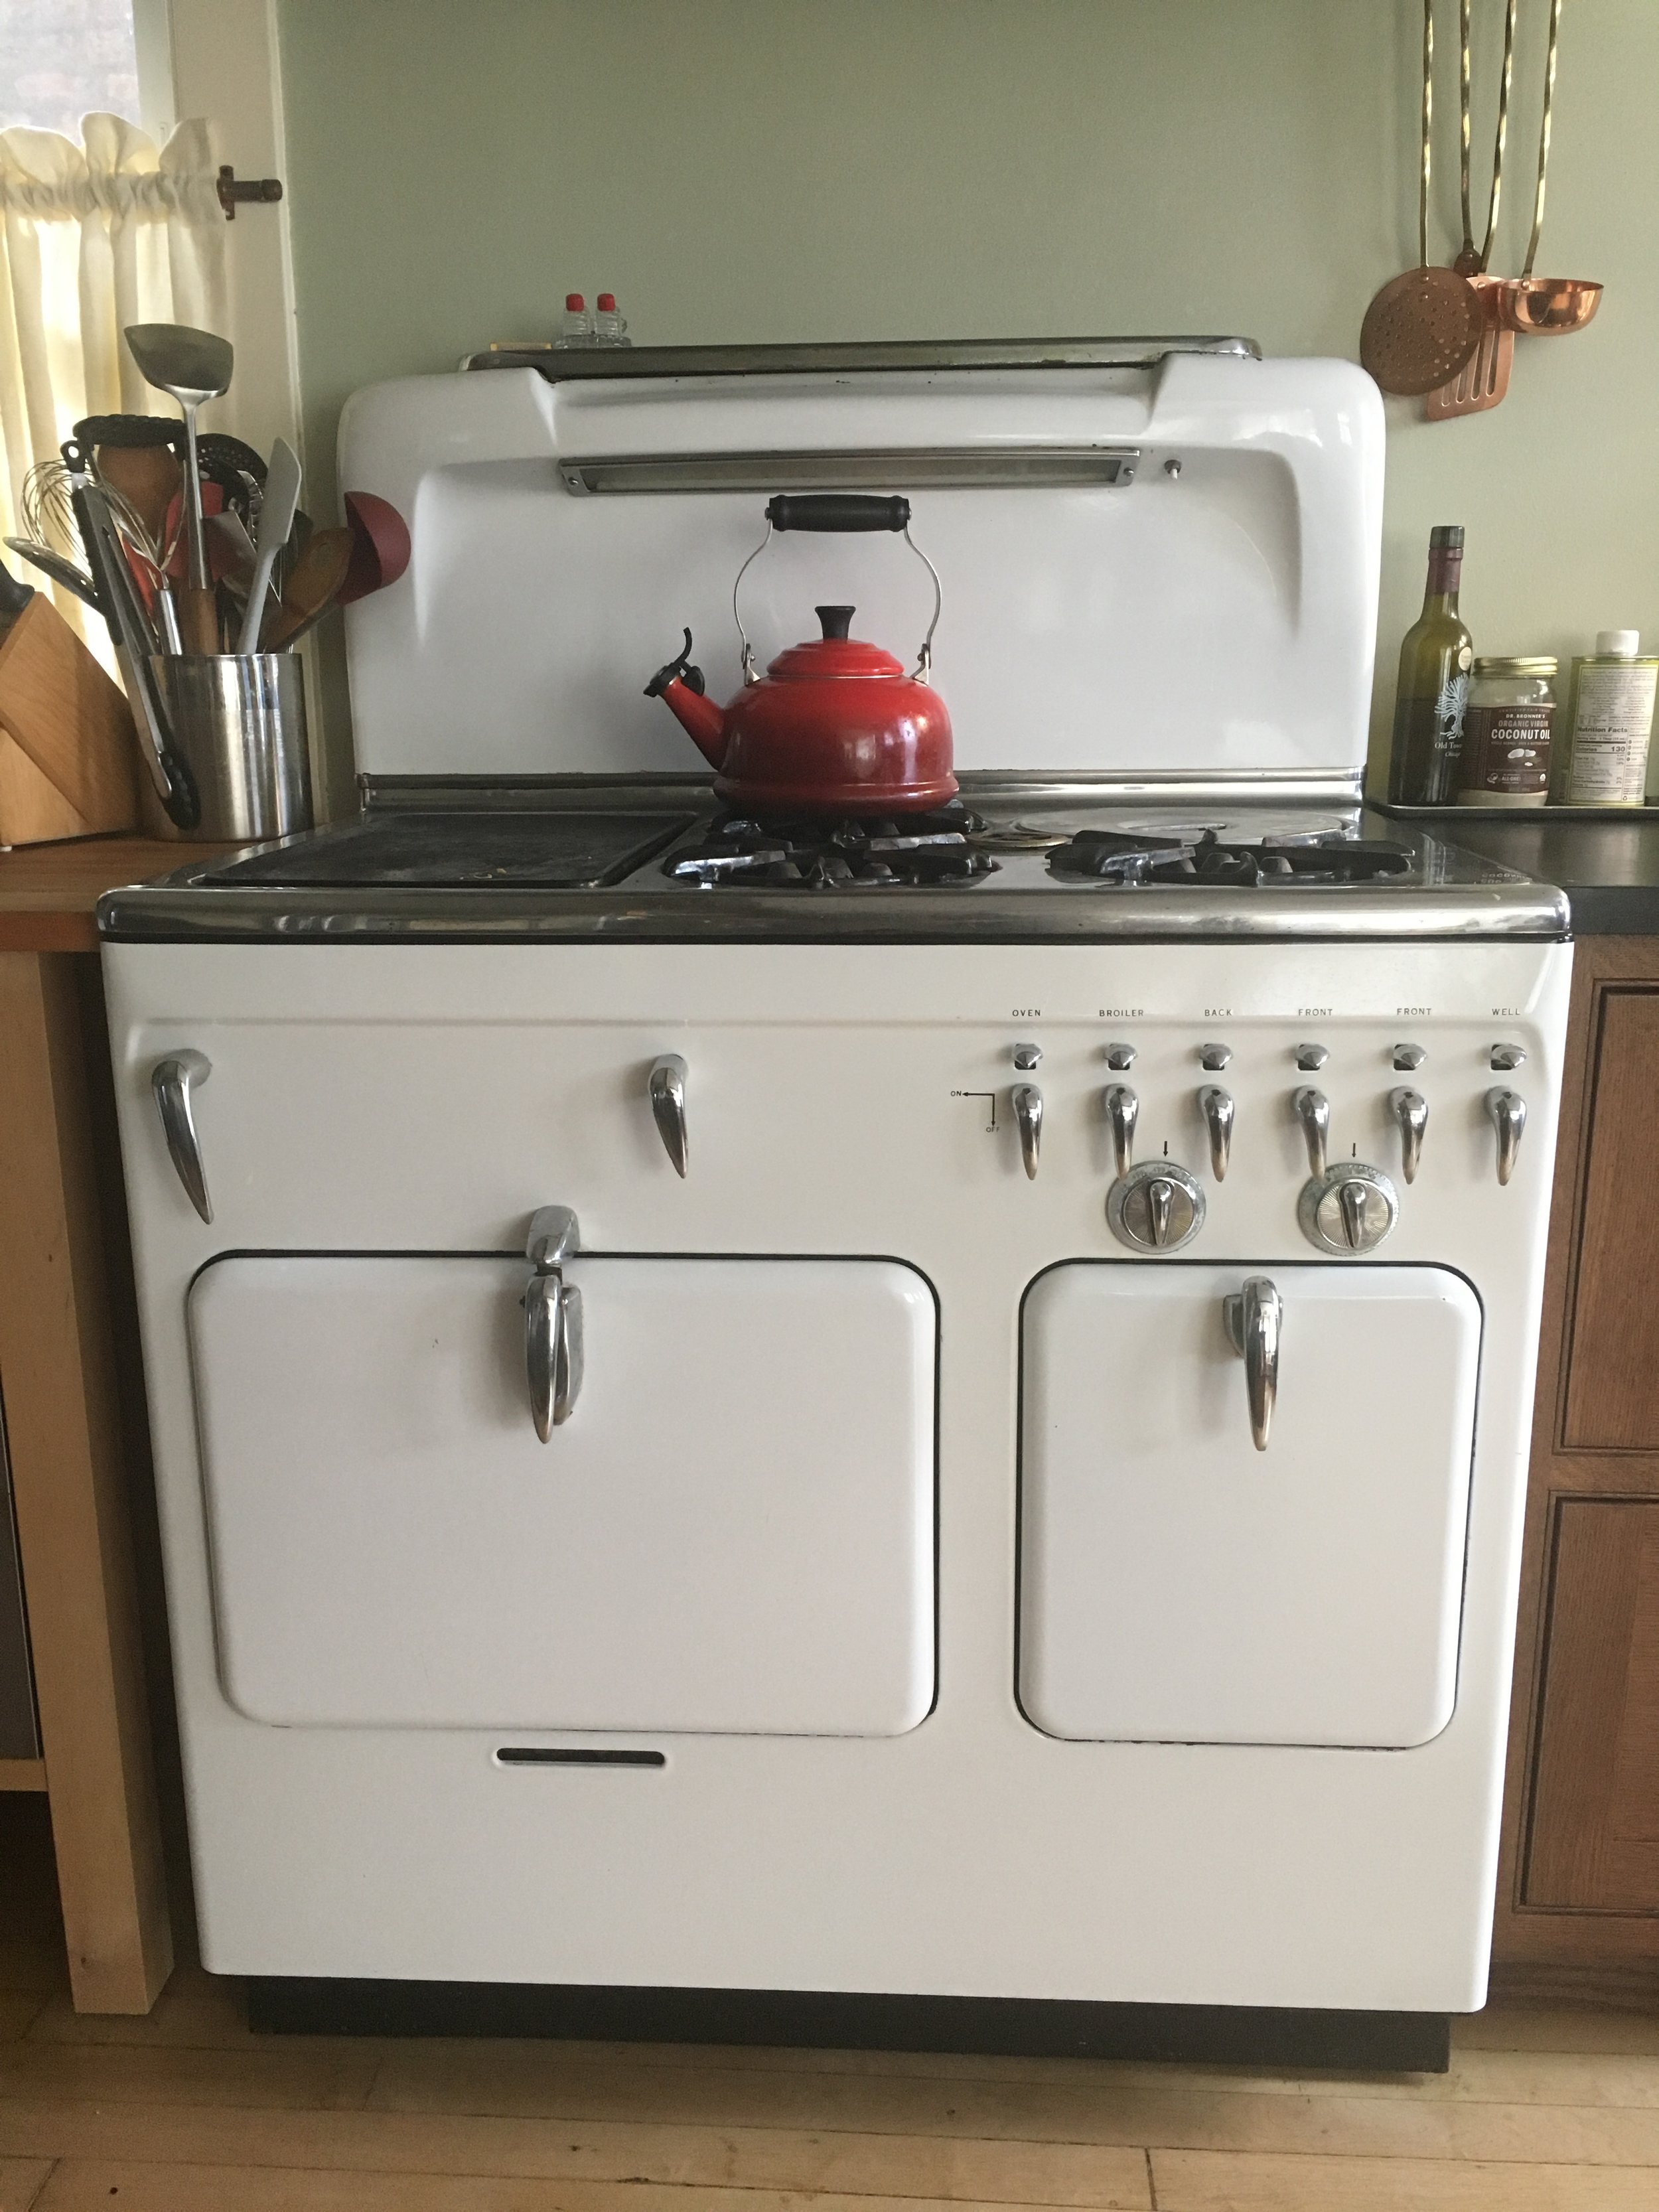
Our client Morgan is a certified e-n-t-h-u-s-i-a-s-t.  We loved her energy so much that we asked her to sign on as our web designer.  When she and her husband Phil remodeled their kitchen, their purchase of a Chambers was just one element of their desire to use as many reclaimed products as possible, both for the aesthetics and for the environmental benefits. Morgan never imagined that an old appliance would become the star of their kitchen. After just a couple of years with their white 90C Chambers stove, Morgan knew that she would never go back to a modern range.  Here's her tale of falling in love with "Babs": 

First, just look at her.

Babs.JPG

Babs is beautiful in a way that few modern stoves are. Just like the stunning cars from her heyday, she’s all rounded edges, curved handles, and lots of chrome. That authentic vintage style is a truly gorgeous alternative to the ho-hum stainless steel, white, or black boxes that can be found in appliance stores today. And in my 1915 bungalow kitchen, Babs looks right at home.

Beauty is important, but functionality is paramount. And Babs can do things that no other stove can. The In-A-Top broiler and griddle has been a game-changer for meals at my house. The griddle surface is ideal for anything that you flip to cook – fried eggs, pancakes, pork chops, grilled cheese – or huge amounts of food, like a double batch of Julia Child’s ratatouille recipe, which I make and freeze every summer. The griddle’s generous size is much larger than even my biggest pan, making quick work of any large recipe.

Bacon On Griddle.jpg

Underneath the griddle is a broiler and sizzle platter, which has completely replaced my toaster oven for toast, bagels, leftover pizza, and anything else that benefits from a broiling flame. I once broiled a Christmas Eve leg of lamb on the sizzle platter; it’s also great for burgers and steaks, especially when it’s too cold to grill. If you cook bacon under the broiler, you’ll be rewarded with a delicious little pool of grease in the sizzle platter’s gravy well. That grease is absolutely perfect for slowly cooking a couple of eggs.

I’ve also found Babs’ top pilot light to be surprisingly useful.

It’s ideal for melting butter, keeping hollandaise sauce or gravy warm, or softening cream cheese for a baking recipe. I have a set of 3.5” stoneware ramekins that happen to fit perfectly over the pilot, and they retain heat quite well. Between the In-A-Top and the pilot light, I haven’t had any need for a microwave since I got this stove.

Of course, Babs also has three regular burners, all of which are more powerful than those of any gas stove I’ve used before. The burners are perfectly sized for my most prized vintage kitchen tools, such as my 1910 cast iron Wagner waffle iron.

My vintage Wagner waffle iron looks like it was made for this burner. In the center of the range is the pilot light. The Thermowell is directly behind the waffle iron.

My vintage Wagner waffle iron looks like it was made for this burner. In the center of the range is the pilot light. The Thermowell is directly behind the waffle iron.

Before Babs came into my life, my biggest concern about living with a vintage stove was the size of the oven. It just looked so much smaller than a modern stove’s. But I’ve never once wished the oven was bigger. My years-old cookie sheets fit perfectly. Last year’s 12-pound Thanksgiving turkey had plenty of space (and tasted incredible). And since the oven is heavily insulated, you can actually cook with the gas turned off. I haven’t converted my recipes to cook this way yet, but it’s very handy for keeping a meal warm when dinner guests are running late.

If I ever do need more oven space, there is a solution already built in: the Thermowell. Often called “the original slow cooker,” the Thermowell is a small, heavily insulated well at the back of the stove that can serve as a fast-heating oven or warming closet. Chambers used to manufacture sets of kettles that fit perfectly in the Thermowell. With a triple kettle set, you could cook three different dishes at the same time! I own a Thermobaker, which is a device that holds a casserole dish, pie pan, cake tin, or a couple of foil-wrapped baked potatoes. The Thermowell truly becomes a second small oven when combined with a vintage Thermobaker.

The Thermobaker.

The Thermobaker.

I recently stayed at an Airbnb with a slick, modern, and likely expensive electric stove. It was the first time in a long time that I had tried cooking a meal on any stove other than Babs. The pans slid all over the surface. I had to press a button to get the burner started. I couldn’t tell when the surface had escalated from barely warm to screaming hot – or when it was cool enough to touch. The oven was comically large for the dishes I cooked inside – a total waste of energy. During that stay, I realized just how much I missed my Chambers’ gorgeous chrome handles and the satisfying sensation of turning them to light a burner. I missed the sound of the burner coming to life. And I really missed how consistent and visible the heat was, and how quickly it would be ready to use.

I feel a bit sorry for the Airbnb hosts who purchased that brand-new, gee-whiz electric stove. I imagine that they were lured in by the range’s sleek digital presence, and by the idea that a new stove must be so much better than an old one.

Well, when I was planning my kitchen remodel, I could have gone that way. I could have spent far more on a brand-new stove. I could have prioritized shiny newness over vintage charm. And I could have made do with just four burners and a huge oven, the way most people do these days, and I likely never would have known that I was missing out on so many other cooking possibilities. But I’m so glad I didn’t. In my mind, you just can’t improve upon the infinitely repairable, simply built, versatile, and gorgeous Chambers stove.  

SERVICE CALL: THE UNSAVORY DETAILS BEHIND THE SCENES

THE LAST THING WE WANT TO DO for a client is replace their oven's thermostat.  First of all, it's a high priced item:  it can cost $500 and up for parts and labor, which can cause a client to trash the stove or have no money left for repairing lots of other items that would make their stove work like new.  Secondly, thermostats are often unnecessarily replaced due to a rookie diagnosis by a so-called professional.  I'm sorry, that's mean of me:  a mistaken diagnosis.  We receive many calls from clients saying that their appliance repair "specialist" inspected their non-working oven and determined that the thermostat is faulty, and since the part is no longer manufactured and not fixable, the stove should be replaced.  That's like a doctor saying after a five minute exam that your pneumonia should be remedied with a lung transplant.  

In diagnosing a non-working oven, the first thing we do is ask very specific questions.  By saying that the "thermostat isn't working", do they mean:

the oven's burner won't light?

the burner lights but the temp doesn't reach the dial setting?

the oven temp takes a very long time to reach the dial setting?

the burner lights and is more than 75 degrees over or under the dial setting?

the oven dial won't turn, or is very hard to turn?

the burner lights and the oven goes past 550 despite the dial setting?

Of all the above, there is only one symptom - the last - that usually indicates an unserviceable thermostat.  Affirmatives to all the other questions give hope that the thermostat is serviceable, or that some other issue may be the cause of the problem.  Among the usual suspects: mineral build-up on the oven gas jet, insects inside the oven gas line, improperly adjusted oven gas jet, bent gas line, depleted lubrication of the thermostat valve.  On ovens with safety systems:  extinguished pilot light, bad thermocouple or poor connection to the safety valve, faulty safety valve, incorrect setting on automatic oven control, faulty servo valve.  In 16 years servicing hundreds of stoves, we've only replaced two thermostats.  All the other "bad thermostat" problems were usually far cheaper and easier to remedy than replacing the thermostat.

Unfortunately, it does happen that occasionally, none of the alternatives check out.  Which brings up the third reason why we hope a thermostat isn't DOA:  it can be a big pain.

My latest client owns a nice 6 burner Roper, pre-war.  Check out this versatile beauty and the original Sellers brand (as in Hoosier cabinets) kitchen:

Roper Sesson.jpeg
Sellers brand built-in cabinets in a stunning original Bungalow kitchen

Sellers brand built-in cabinets in a stunning original Bungalow kitchen

Her oven had suddenly started burning the family's meals: right before Christmas.  After running her through the gauntlet of questions, there was little room for doubt: her oven temp went through the roof no matter what setting.  I was already booked for the entire week before Christmas, and she agreed to pay the premium price for after-hours service. 

Now began the hunt:  hopefully we had a loose identical or compatible rebuilt or used T-stat in stock.  Nope.  Okay, hopefully we had a stove in the shop with a T-stat that might work.  A late 50's Kenmore looked surprisingly good.  "Surprisingly", considering that the client's stove was so different in era and brand.  So the shop guys and I pulled the stove from its spot, prepped it for operation (they are typically semi-disassembled and need to be fitted with new connectors), and fired it up.  It took awhile but I was able to get the thermostat's various functions into calibration.  Fantastic: we now had a used thermostat to pull for the job that I knew worked and was already spot on.

But in having a final look at my client's photos, I realized I couldn't fully see the connection behind the T-stat body to the oven's gas tube.  When she sent better photos, it became sickeningly clear that the Kenmore's connection was not in fact compatible.  All that time with the Kenmore - wasted.

Next strategy:  check out all the other stoves in our off-campus storage.  Fortunately we photo archive any stove we acquire so that we can "remotely" inspect their components on the computer, and of course the most likely prospect was our oldest Roper, a dual oven:  it was still of a more recent vintage than our client's Roper, but its T-stats looked practically identical, including the proper connection.  The twin ovens were a plus:  since we had already spent so much time on the project, we didn't want to drag this stove to the shop in order to set it up and test the T-stats, so we'd yank both T-stats to bring to the job, and have a good chance of one of them working. 

On the "unfortunately" side of things, this Roper was crammed in the back corner of a cold, unlit room with lots of stoves, so we had to remove half of the stoves in order to get to it.  On the "fortunately" side, by disassembling it to remove its T-stats, I'd have the process down when I showed up at the client's door:  Always good to anticipate a cherry pie hiding among the pits.

I spent about an hour at the shop cleaning the thermostats, packed up all our service tools and supplies, and headed out, confident that for this particular job at the end of the day, I had covered all the bases.  Lot's of prep work on this one, way more than usual, but at least the overtime fee I'd be charging could make it worthwhile.

If only I had noticed that the client's photos clearly showed that her thermostat had a very different connector for the pilot line than what our T-stat had, because it wasn't until I had spent about three hours at her house testing her thermostat, tearing it out, then installing the replacement, that my own rookie mistake was exposed.  Some night it's cherry pie, other nights it's humble pie.  And the topping?  Instead of whipped cream, it would be telling the client that because no repair had been accomplished, I would cut the overtime fee to my regular rate, and come back with the solution before the new year's holiday (to which she had re-scheduled her family gathering).

Adding to my humiliation was realizing the obvious fix:  by simply hacking off the end of the pilot line on our stove in storage, which had the proper fitting, I could have then joined that 3/16" tubing to the client's 3/16" pilot line with a "union" fitting.  Simple.

But "simple" wasn't in this card game in the first place, and wasn't about to show up just anytime soon. 

To wit:  on the morning of the follow-up service call, I figured I could save time and avoid returning to the storage space, pulling out 6 stoves, and hacking off the needed connection, by instead purchasing a 3/16" flared nut (common on old car brake systems) at a random auto supply store on the way to the job, even though I knew the one particular auto supply store with old-timey brake part fittings, in the opposite direction of the day's jobs, might be the surer, safer bet.  Well, you guessed it, the random store didn't have the 3/16" flared nut, and I'm already running 30 minutes late.  A call to the client to inform of the delay, and I head to the old-timey shop in the opposite direction.

And no, they didn't have the nut either.

So to the storage space I go, yanking out all the other stoves in the way of the Roper.  Exactly WHY hadn't I placed the other stoves in first so the Roper would be right there when I opened the door?  Hack off the pilot fitting.  Shove the stoves back in. (Don't even ASK where the Roper ended up).  Another phone call to my client for the now 2 hour delay and I'm a dangerous projectile hurtling toward the suburbs.

Finally arriving, I was hopeful that I had crossed my T's and dotted my I's, yet quite aware that things weren't going the way that I had hoped from the get-go.  

One hour after arriving, the original T-stat was out, and I was comparing the two side by side from every which way:  Centering of the control dial axis:  check.  Length of the body from the center of the manifold mount to the front:  check.  Distance between the centers of the two mounting screws:  check.  Everything seemed okay, and I proceeded to install the replacement.

First was threading the thermostat's sensor through the top of the oven jacket for placement inside the oven:  a delicate task due to the frailty of the very thin copper capillary tube that connects it to the thermostat - one small crack and the T-stat's toast. 

Next was inserting the two mounting screws into the T-stat body.  This is where things got very interesting (It's often handy in front of a client to replace the urge for emitting loud curse words with the thought: "very interesting".  It seems to be the better choice for maintaining their confidence).  It was clear that the mounting screws for the original thermostat were slightly thicker than the holes of the replacement.  How very interesting!  Did I bring the thinner screws from the other thermostat?  Well of course I did but I couldn't find them at the time, which was also "very interesting".  Luckily, before my head exploded from self contempt, I realized that the thinner screws wouldn't help anyway because of course the threaded holes in the manifold were too big for the smaller screws and by God I'd just have to figure out some way to deal with the problem, which did NOT include coming back with another thermostat.  How very very interesting, goddammit.

The only apparent option was to widen the holes in the replacement T-stat, a simple enough task with a proper drill bit, as long as they were drilled straight.  Luckily this was sufficiently accomplished.  But...

Turns out the screws, when inserted into the widened holes, did not project out of the bottom of the holes, which was necessary for them to screw into the threads of the manifold.  This made it suddenly clear that the body of the replacement T-stat was thicker at that dimension then the original.  

This was no longer the least bit interesting.  And of course whenever I need my Dremel tool, I usually fail to bring along my Dremel tool.  Suffice it to say that my Dremel tool would have been very VERY handy in this situation.

At this point any and all further "interesting" inconveniences would be dealt with a large hammer.  Backing off that mind set just a skosh, I selected a large drill bit, inserted it in my drill, and bored down into the soft aluminum about 1/4".  Not pretty, but it did the job.  Tightened down the screws, attached the oven gas tube, and the joining of the two pilot lines with the union went swell.  Turned on the gas, applied soap solution to all new connections yielding no soap bubbles, so no leaks.  Fired that thing up, set the dial to 250 and in ten minutes the temperature plateaued at about 175.  Hallelujah!  Within 30 minutes all adjustments had been made to get the temp spot-on with the dial, and the bypass flame, pilot and other T-stat functions were more than happy.  All was as the Roper gods had intended when this stove shipped out of Rockford, Illinois about 80 years ago.

Roper Sesson 1.jpeg

Not all 7 1/2 hour service calls take the same amount of time to prepare for, thank God.  Most take between 30 to 60 minutes.  Occasionally, however, the needs of a vintage stove can push your friendly service technician to extremes.  So when you require help for that 3/4-century old stove which hasn't required a dime for repairs all the years that you've owned it, please grant some understanding when we charge a service fee to show up at your door.  We have probably earned it.

THE STOVE THAT STARTED IT ALL

Have you ever been to Cincinnati?  I simply love the place, specifically the "Over The Rhine" area, also know as OTR.  It's were my dad was born, and was our family's summer road trip destination for many of my early years.

For decades Cincinnati's perch on the Ohio river made it the Gateway to the West for immigrants using water highways to make their way from the east coast to lands beyond the Mississippi.  Its frontier port town identity is reflected in dense concentrations of 1800's architecture.  Seriously detailed and colorfully painted residential and commercial brick buildings cling to steep hills overlooking downtown and the beautiful bridges spanning the Ohio river.

Roebling bridge.png

Yes, this bridge should look familiar.  The John A. Roebling Bridge, 1867, was the practice run for the Brooklyn Bridge, completed in 1883.

The steep grades of many Cincinnati streets puts the fear of God into any flatlander driving a stick shift.  My aunt loved to ride her (1 speed!) bike on those hilly streets as a kid, and cried because her over-developed calves inspired some schoolmates to tease her for having boy's legs. 

When I'm trying to sum up Cincy's look and feel to someone in just a few words, "San Francisco of the Midwest" is my default phrase.  The photo I show is this view from our friend's house, in the heart of OTR:

Cincy Downtown.png

Considering all the contributing factors, my love for the Queen City is unavoidable:  besides the great combination of landscape and architecture, it's also home to a large number of both my mom and dad's ancestors, who I have researched back to the 1830's.  The pleasantly particular accent of its denizens is a spin on "Southern" unlike anywhere else in the South.  The influx of skilled craftsmen during its heyday, along with plenty of the required natural resources, enabled art to flourish in Cincinnati.  Its museums are spectacular, showcasing local murals and ceramic works of international prominence, including Rookwood pottery, which points to the prominent role women had in Cincy's nascent art scene. Cincy was also an early incubator of the Arts and Crafts movement, and has some stunning examples of Art Deco themed buildings.   

When in Cincinnati, DO NOT, under any circumstances, omit a visit to the Union Terminal train station, a high holy temple of Art Deco. 

When in Cincinnati, DO NOT, under any circumstances, omit a visit to the Union Terminal train station, a high holy temple of Art Deco. 

Although it's closed right now for renovations, it's definitely worth a visit to experience the grandeur of the building's exterior and grounds.  

Although it's closed right now for renovations, it's definitely worth a visit to experience the grandeur of the building's exterior and grounds. 
 

Then there's Cincinnati's singular food and drink:  Skyline chili, Goeta, Graeter's ice cream, and, mmm - beer.  OTR was the original center of the lager beer universe, and is making a spectacular comeback due in no small measure to - you guessed it - beer!  (See my link page and praise for the book When Beer Was King).

Yeah, so there's all those things that are great about Cincinnati.  Ultimately though, what really motivates my wife Kathleen and me to finally pack up and drive the 5 hours isn't beer, architecture, or cute little hot dogs with chili and cheese - really really tasty hot dogs, chili and cheese - oh they are so good.  No, actually, it's our love for our friends Steve and Denise. 

Denise's smile would light up the darkest vault in a mausoleum at midnight, and her singing would bring the inhabitants back to life.   Steve is a master restoration builder, passionate about preserving the genius of Cincy's old world craftsmanship.  Much of what he's seen throughout town he's distilled inside their home, with brilliant color choices that makes it a four story religious experience.  Steve's hand-made hinges, rounded plaster corners, high, sculpted baseboards and other details all attest to his skill, knowledge, and reverence for the artisan craftsmen that rendered Cincinnati into a unique and rich collection of architectural treasures.

So I guess that it's really no surprise that it was in Cincinnati, in Denise and Steve's home, back around 1998, that we first laid eyes on a Chambers stove, their baby blue Model C.

It was awe and lust at first sight.  Besides the sheer beauty of the dang thing, part of the draw was the mystery of it:  where did it come from?  How did it work?  No one really knew.  Supposedly it was made out of cast iron and had a brick-lined oven that let it cook at 1000 degrees, and it could even cook without the gas on. 


All that we knew for sure was that we loved those tear drop handles, the sensuous curves, the deep golden glow of the timer and oven dials, and the chromium blue pattern of the cooktop flames against the deep black porcelain drip pans and burners.


A few years later, when our post-infant son started crawling around the sticky floors of our decrepit kitchen, we coughed up a fur ball of dough to start remodeling.  We weren't really considering a Chambers:  for all we knew, Steve and Denise's was the only one in the world (note to digital natives:  This was before the internet).  So we started looking at new stoves, and were immediately, thoroughly underwhelmed by bland looks, shoddy construction, and a weirdly slimy feel of touchpad controls.  Although it may have something to do with the fact that Steve designed the layout of our kitchen, my wife and I decided that no way would the shadow of a new stove ever darken our front door.  We asked our Cincinnati friends to keep their eyes peeled for an old stove, and if it were a Chambers like theirs, well, it wouldn't exactly hurt our feelings.

Turns out Steve recalled that he had helped a friend move into a house 20 years previous, and he was pretty sure there was a Chambers in the basement.  He called the friend and the stove was still there, unused since the move, and it was indeed a Chambers, an older, white model B. 

In a blink of an eye Kathleen and I were in Cincy with the minivan, to pick up some Coneys and the stove, er, the stove and some Coneys.  Soon afterwards, the Model B was in a heap of parts in my basement shop.  More about that later. 

I tell this story practically every time I do a Chambers service call, so why not just put it in my blog for the whole world to see?  Denise and Steve, thanks for welcoming me into your "neighborhood", and for introducing me to the world of Chambers stoves.  I know that I am but one of the hundreds of people who have been inspired by the love and creativity you two surround yourself with, and radiate from every pore.

PORTFOLIO: Chambers Ranges and Cooktops

Seeing the beautiful kitchen settings that many of my clients build around their Chambers is one thing I love about my job.  Often I will yank a stove in the middle of demolition, with dust and mayhem swirling around my lungs and mind as I'm driving away with the stove on the way to the shop.  Man I wish that I'd been photographing those demos… They can be so gawd-awful, and so entirely different to the scene I return to with the repaired or restored stove.

Here are photos of a few of those stoves and owners in some of the more beautiful settings, some redone, others original: 

Most of the settings I install Chambers in are vintage, and most of them are visually busy.  That's why I like the stark contrast here, in my client's small cottage in Lake Geneva, Wisconsin. Compare this with her brother's place below.

Most of the settings I install Chambers in are vintage, and most of them are visually busy.  That's why I like the stark contrast here, in my client's small cottage in Lake Geneva, Wisconsin. Compare this with her brother's place below.

A modest and elegant setting, brilliantly remodeled with vintage steel Geneva cabinets in a Chicago two-flat.

A modest and elegant setting, brilliantly remodeled with vintage steel Geneva cabinets in a Chicago two-flat.

Tom and Nancy are both fantastic artists.  They own a nice Model C low back in their funky Chicago bungalow.  The stove shot is nice but heck with it, I love this shot so much better. 

Tom and Nancy are both fantastic artists.  They own a nice Model C low back in their funky Chicago bungalow.  The stove shot is nice but heck with it, I love this shot so much better. 

Joe with his pride and joy Model C, in a great original vintage "sunrise" kitchen in Elmhurst, Illinois.

Joe with his pride and joy Model C, in a great original vintage "sunrise" kitchen in Elmhurst, Illinois.

This gorgeous space - in a similarly gorgeous Arts and Crafts home in Glen Ellyn, Illinois - was created by my friends Jim and Deb.  Does it surprise you that they are designers?

This gorgeous space - in a similarly gorgeous Arts and Crafts home in Glen Ellyn, Illinois - was created by my friends Jim and Deb.  Does it surprise you that they are designers?

The place that inspired this post:  I was working on Mark and Michelle's Chambers in Lombard, Illinois while big guys were ripping out the floor and wall around their wonderful farm sink.  On returning, I found the sink surrounded by clean…

The place that inspired this post:  I was working on Mark and Michelle's Chambers in Lombard, Illinois while big guys were ripping out the floor and wall around their wonderful farm sink.  On returning, I found the sink surrounded by clean symmetry, facing their model B blacktop shown below. 

The presence of the yellow drapes, bowls, plates and tea kettle is so slight, yet so awesome, it totally knocks me dead.  Mommy, I WANT THIS KITCHEN!!!

The presence of the yellow drapes, bowls, plates and tea kettle is so slight, yet so awesome, it totally knocks me dead.  Mommy, I WANT THIS KITCHEN!!!

To the right is another Model B with black porcelain top and handles.  Ironically, this was the cheapest version of the model, yet the black top and handles create such great accents in white kitchens, this one so very nicely done in Mequon, Wi…

To the right is another Model B with black porcelain top and handles.  Ironically, this was the cheapest version of the model, yet the black top and handles create such great accents in white kitchens, this one so very nicely done in Mequon, Wisconsin. 

On a slim budget?  Here's an instance of how a Chambers can BE the rehab in an existing, non-vintage kitchen.   My friends Eric and Emma simply dropped in Baby Blue (which Eric helped me restore), then cleaned the cabinets, painted the wal…

On a slim budget?  Here's an instance of how a Chambers can BE the rehab in an existing, non-vintage kitchen.   My friends Eric and Emma simply dropped in Baby Blue (which Eric helped me restore), then cleaned the cabinets, painted the walls, and added furniture and dishes that riff off of the stove.  In my humble opinion, they got themselves the best dang kitchen in upstate New York, Millbrook, specifically.

I couldn't put two more starkly different photos together than the one above and the one below.  My Munster, Indiana client loved her Chambers cooktop but needed to do a total rehab for her elderly mom's kitchen.  Normally I prefer color b…

I couldn't put two more starkly different photos together than the one above and the one below.  My Munster, Indiana client loved her Chambers cooktop but needed to do a total rehab for her elderly mom's kitchen.  Normally I prefer color but I gotta say that this contemporary monochrome treatment incorporating the vintage cooktop is quite attractive.

Finally, check out this gorgeous mint green Model BZ in a  quaint cabin in Three Oaks, Michigan, near New Buffalo.  First time I've ever seen a BZ in other than white or yellow plumage.  Next to that brick chimney with that yellow fau…

Finally, check out this gorgeous mint green Model BZ in a  quaint cabin in Three Oaks, Michigan, near New Buffalo.  First time I've ever seen a BZ in other than white or yellow plumage.  Next to that brick chimney with that yellow faux lure…  Mmmm mmm!  That's a-nice!

CAN'T STAND THE HEAT?...

Many of us, especially in the south, choose not to have our cooktop and ThermoWell pilots going in the summer. It really cuts down on heat in the kitchen.  Extinguishing the pilots at summer solstice, and relighting at the fall equinox, can put Chambers owners in touch with the seasons.

My wife and I don't actually live in the south but we are of southern Italian heritage, so we don't like air conditioning and generally just like to do things in more difficult ways than is normally done.  So on the first hot days of late spring we turn off the gas to the ThermoWell and cooktop pilots.  Thereafter we must use a grill igniter (we call it Sparky) to light the cooktop burners when we need them.  It usually takes a little getting used to:  we flip a burner lever and stare at the cold dark iron for a few seconds until we remember to grab Sparky and make fire happen.  In those first few weeks I'm sure we waste more gas than the pilots would ever consume over the summer, but it does actually keep the kitchen cooler.  Here's the "How To":

Models A/B/BZ

Remove the grate and drip pan from the front left burner. My finger is pointing to the flash tube.  Lift its tip off of the burner body in order to get better access to the control valves for the cooktop and ThermoWell.  The valves, shown at left, are small brass bodies attached to the stove's manifold (gas supply pipe).  You may have to go through the right REAR burner opening to access the cooktop pilot valve.

With a medium to large screwdriver, turn the cooktop valve clockwise to reduce and turn off the pilot.  The valves may be "frozen" if they haven't been serviced.  If so, gently but with some force turn the screwdriver in one direction, then the other, many times until the valve starts to turn.  Now turn the valve gently clockwise until it stops.  The pilot flame should be out and you should not smell any gas.  Repeat the process for the ThermoWell.

Models C and D

Open up the service compartment door, and to the upper left you will see the pilot valve heads (yellow arrow).

Sometimes it's a filter with two screws, other times it's a filter to which the pilot valve assembly is attached.


The upper screw head is for the cooktop pilot, the lower is for the ThermoWell.  Adjust as described above.

Of course when fall comes around we reverse the process, and experience a giddy sense of awe at simply turning a lever and having fire magically appear!  How incredibly awesome and convenient!  Some would argue that a Chambers range with two pilot lights going is not efficient or environmentally friendly.  I respectfully disagree.  During the winter, whatever heat those pilots are putting off are taking load off the furnace for warming the house.

As a Chambers owner, you already know how fabulously interesting life can be.  Make it even more so by getting in touch with the rotation of the planet by the seasonal extinguishing and lighting of your ThermoWell and cooktop pilots!

TECH TIP:  The proper height of you cooktop pilot flame is about 3/4".  Shorter is fine, as long as it still easily lights your burners, and stays lit with whatever drafts exist in your kitchen.  Same for your ThermoWell pilot.  Whatever it's height, you don't want to have any orange in the tip of the flame.  That indicates incomplete combustion, creating excessive carbon monoxide that may cause an unpleasant smell, and gives some people headaches.

KEEP THE TURKEY OUT OF THE CHAMBERS?

Thanksgiving is right around the corner.  For a succulent turkey with golden crispy skin, nothing beats a Chambers.  Well, almost nothing... 

Heretical as it may sound, it's my belief that the best way to use a Chambers for the Great Turkey Day is to save it for all the miscellaneous baked sides:  pie, potatoes, extra dressing, biscuits, etc, etc.  Though I truly worship a Chambers turkey cooked in a Lisk or Reed roaster, the logistics of lots of people to feed with lots of baked items puts a squeeze on the ol' fireless range.

Fortunately, there is a more than adequate solution:  the fantastic Nesco Electric Roaster.

My advice, of course, is to look for a vintage Nesco, just to maintain the aesthetic.  Easily found at estate sales, Goodwill or other thrift stores, or online on Craigslist or Ebay.  I think the old ovals are very cool looking, but most often you'll find them in a rectangular shape, plenty big for a 20 lb. turkey.

A Nesco Deluxe Roaster with Timer Clock. One of their fancier models.

A Nesco Deluxe Roaster with Timer Clock. One of their fancier models.

Vintage or modern, these countertop cookers do a fabulous job on Tom Turkey while keeping the Chambers free for other things.  That's how Tillie (grandma Oliver) did it throughout my childhood.  Man, the smells are wafting through my olfactory as I type.  Tillie's children, grandchildren and great-grandchildren still do it that way.

Some are fancier than others, such as the Deluxe with Timer Clock.  These can be programmed, er, excuse me, pre-set, to start and stop at desired times.  If you are lucky you'll run into one with it's own rolling cabinet so it doesn't take up any countertop space.

 
A Nesco oval roaster.

A Nesco oval roaster.

My oval Roastmaster, shown at right, has a simple temperature knob with indicator light.  I love it. 

Like a Chambers, they're well built with little to go wrong.   Make sure it comes with the wire rack to place the turkey on:  it keeps the bird from directly contacting the bottom, and makes it possible and safe to lift the finished bird out in one piece.

Nesco's often come with cool nesting containers for cooking items separately from each other.  The original manuals are very useful and often entertaining (possum recipes, interesting narratives on domesticity, etc.).

Nesco nesting pots, which fit inside the oval roaster.

Nesco nesting pots, which fit inside the oval roaster.

The usual fix-up for them is to replace their frayed, brittle power cord or a knob, easily done at your local Ace Hardware.  Just bring in the old one for reference.

With your cool looking and ultra practical vintage Nesco roaster infusing your home with saliva-inducing aroma while turning tom turkey into a golden ball of protein, your Chambers oven is free to take on all the other goodies.  Holiday stress?  Thing of the past.  Sometimes your own fabulousness is hard to ignore.

This time - just before the baking holidays - would be the time to make sure your Chambers is operating at peak.  You will enjoy your Chambers so much more when it's adjusted and lubricated to operate and perform the way it was meant to.  Contact us to schedule an inspection and low cost tune-up. And check out this vintage video of a Westinghouse Roaster!